Friday, February 10, 2012

CANDY HEARTS NAIL ART TUTORIAL

This one you could wear for Valentine's Day or an Anniversary or any time. I call it "Candy Hearts".


I will be posting a tutorial for this design next week, so please come back and check for it.

I am so excited. Even though I have been doing my own gel nails and nail art for over 2 years, I have made the decision to go to nail tech school, which I will be starting in the spring and early summer. It is really kind of weird to be posting to my only two followers, but I figure it is good practice for this blogging thing. I have never done blogging before and sometimes it is easy to just ramble, so sorry for that.

Well, I am off to do more nail art.....until next time.....

SWISS DOTS N RIBBONS NAIL ART

So, I am sitting in my craft room and I see a basket of swiss dot ribbon and I think...wow, what a cool nail art design that would make and so here is a tutorial for you.  This is a very easy beginner nail art, so don't be afraid to try it.


Supplies needed:


First, always put a base coat on.  I use Seche Vite Base Coat.  Then paint two coats of White...this will make the colors pop!!


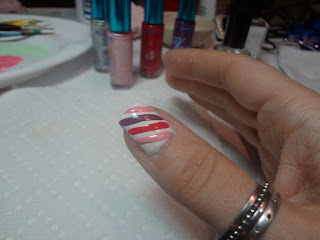
Then paint a diagonal stripe of pink, then leave some space and paint a purple stripe, then a red one and then a pink.  If your nails are longer than keep painting stripes in the continued pattern, but leave enough space after the last stripe for the silver glitter polish.


 Then use your silver glitter polish and fill in the stripes in between the colored stripes, like so:

  
After you have completed the glitter polish, grab your dotting tool and start placing dots on each of the "ribbons"....after the dots dry, put on 2 coats of top coat.  I use Seche Vite Top Coat....When completed, it will look like this:


Here it is completed on one hand:

Come back soon and see my newest nail art designs.....thanks for looking!!


CHEESE PEPPERONI SNACK


Here is a snack that I love so much and it is very low in carb.  It helps when I am done with my carbs for the day and need a little something more.

This recipe of sorts has been around the internet for sometime, but I have never seen them done this way.

Place some parchment paper on a cookie sheet (this is just so that they won't stick) and then I put a small pile of my favorite shredded cheese....my favorite is Monterey Jack and put on the parchment paper.  I usually make about 6 small piles of cheese at a time, because my hubby likes them too and put 2 pieces of pepperoni on the piles of cheese and then place them in a 400 degree oven for 10 minutes.  Set your timer, these are no good if they burn.

When they are done, remove them from the oven and with a spatula, put them on a paper towel to soak up the extra fat....wait a few minutes and eat....I dip mine in ranch dressing and they are amazing!!  These will keep for a few days in a container.

So drop me a line if you make these and let me know what you think.

If you are following a low carb diet, then these will be a perfect snack for you.

Oh also, I love salad and I make these with fresh shredded parmesan cheese...make these and you won't miss the croutons...guaranteed!!

Well, until later.....I am hungry...going to go make some cheese pepperoni crackers ;o)

Here I made them and ate them with  homemade chicken salad....yum!!